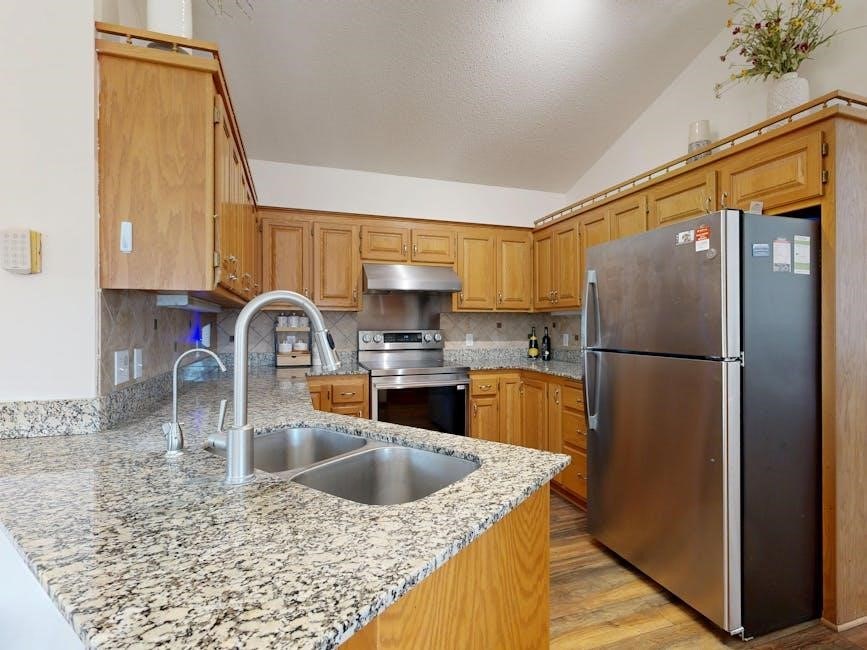
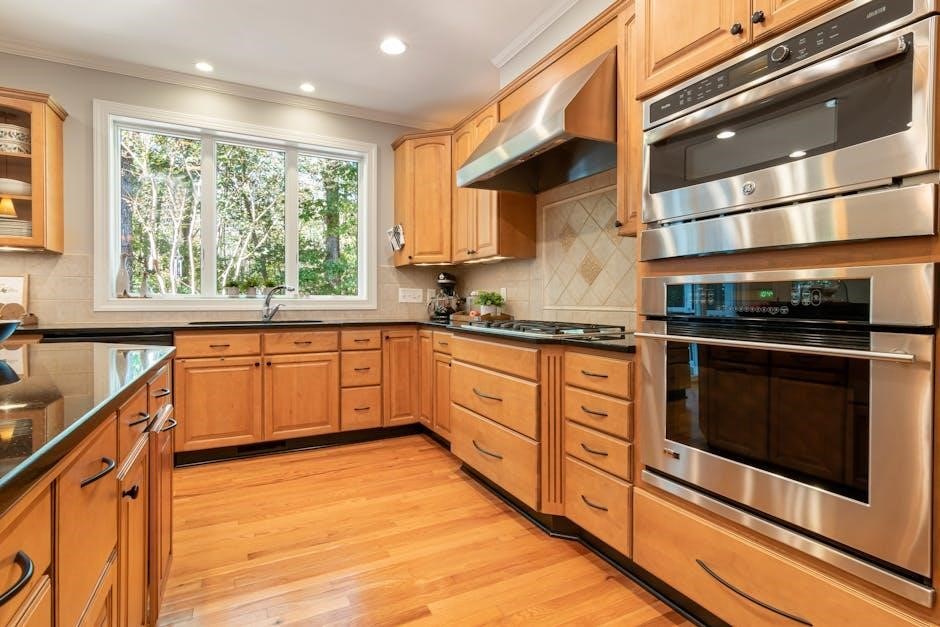
Maytag Gemini Double Oven User Manual: A Comprehensive Guide
This manual provides detailed instructions for installation, operation, and maintenance of your Maytag Gemini double oven, ensuring optimal performance and longevity.
Welcome to the world of convenient and versatile cooking with your new Maytag Gemini double oven! This appliance is designed to simplify meal preparation, offering the flexibility of two ovens in one. Whether you’re a seasoned chef or a beginner cook, this manual will guide you through every aspect of your oven’s functionality.
The Maytag Gemini boasts a spacious interior and advanced features, allowing you to bake, broil, and roast with precision. From unpacking and initial setup to utilizing the self-cleaning cycle, this guide provides comprehensive instructions. Understanding your oven’s capabilities will unlock a new level of culinary possibilities, making cooking a truly enjoyable experience. Prepare to explore the full potential of your Maytag Gemini!
Safety Precautions & Important Warnings
Your safety is paramount when operating this appliance. Always read and understand these precautions before using your Maytag Gemini double oven. Never attempt to repair the oven yourself; contact qualified service personnel for assistance. Ensure proper ventilation during operation to prevent carbon monoxide buildup, especially with gas models.
Keep flammable materials away from the oven and supervise children closely when the appliance is in use. Avoid touching heating elements during or immediately after operation as they remain extremely hot. Disconnect power before cleaning or performing maintenance. Failure to follow these warnings could result in fire, injury, or damage to the oven. Prioritize safety for a worry-free cooking experience.
Unpacking and Initial Inspection
Carefully unpack your Maytag Gemini double oven, removing all packaging materials. Inspect for any visible damage incurred during shipping, such as dents, scratches, or broken components. Immediately report any damage to the retailer and shipping carrier. Verify that all included accessories – racks, broiler pan, and this user manual – are present.
Do not discard the packaging until you are fully satisfied with the condition of the oven. Ensure the oven’s interior is free of packing materials before installation. A thorough initial inspection prevents potential issues and ensures you receive a fully functional appliance. Retain proof of purchase for warranty claims.
Installation Requirements
Proper installation is crucial for the safe and efficient operation of your Maytag Gemini double oven. Ensure the intended location meets all specified requirements before proceeding. This includes verifying adequate electrical supply, appropriate gas line connection (if applicable), and a compliant ventilation system. The area must allow sufficient clearance for airflow and servicing.
Consult local building codes and regulations for specific installation guidelines. Incorrect installation can void the warranty and pose safety hazards. Professional installation by a qualified technician is highly recommended, especially for gas line connections. Prior to installation, confirm the floor is level and can support the oven’s weight.
Electrical Connection
The Maytag Gemini double oven requires a dedicated electrical circuit, typically 240V, 40 amps, with a properly grounded three-prong outlet. Do not use an extension cord or adapter plug. Ensure the circuit breaker is appropriately sized to handle the oven’s power demands. Before connecting, verify the voltage matches the oven’s specifications, found on the model rating plate.
Electrical work should only be performed by a qualified electrician, adhering to all local and national electrical codes. Improper wiring can create a fire hazard or damage the oven. Always disconnect power at the breaker before making any electrical connections. Confirm the ground wire is securely connected to prevent electrical shock.
Gas Line Connection (If Applicable)
If your Maytag Gemini model utilizes natural gas or propane, a qualified gas technician must perform the connection. Never attempt this yourself. Ensure the gas supply to the oven is turned off before beginning any work. Use a new, approved flexible gas connector, and apply pipe joint compound specifically designed for gas lines to all threaded connections.
Check for gas leaks using a soap and water solution after the connection is complete. Bubbles indicate a leak; immediately turn off the gas supply and tighten the connections. The oven must be properly vented to the outside to prevent carbon monoxide buildup. Adhere to all local gas codes and regulations.
Ventilation System Requirements
Proper ventilation is crucial for safe and efficient oven operation. The Maytag Gemini double oven requires adequate airflow to prevent overheating and ensure proper combustion, especially during self-cleaning cycles. A dedicated exhaust hood vented to the outside is strongly recommended, adhering to local building codes.
Ensure the exhaust hood’s capture area adequately covers the oven’s location. If direct venting isn’t possible, ensure sufficient general room ventilation. Do not block or obstruct any ventilation openings on the oven itself. Improper ventilation can lead to carbon monoxide buildup and void the warranty.
Leveling the Oven
Achieving a level installation is vital for optimal baking performance and door sealing. Use a bubble level placed on the oven top, both side-to-side and front-to-back, to check for levelness. Adjustable legs are located at the oven’s base; rotate them clockwise to lower the oven and counterclockwise to raise it.
Adjust each leg incrementally until the oven is perfectly level. A slightly forward tilt can aid door closure. Once leveled, securely tighten the locking nuts on the legs to prevent shifting. Re-check the level after tightening. An unleveled oven can cause uneven cooking and potential safety hazards.
Initial Setup & Control Panel Overview
Before first use, remove all packing materials from both oven cavities and the control panel area. Plug the oven into a grounded outlet, or connect the gas line if applicable, following the installation instructions. The control panel illuminates upon power-up.
Familiarize yourself with the buttons and displays. Common controls include oven selection (upper/lower), function selection (bake, broil, convection), temperature adjustment, timer settings, and self-clean options. The display shows the current oven temperature, timer countdown, and selected settings. Proper understanding of these controls is key to efficient operation.
Understanding the Control Panel Buttons & Displays
The control panel features intuitive buttons for selecting oven functions like Bake and Broil, alongside digital temperature controls. Dedicated timer buttons allow precise cooking duration settings. Oven selection buttons clearly indicate which cavity – upper or lower – is being controlled. The digital display showcases set temperatures, remaining cook times, and active functions.
Additional buttons may include convection settings, self-clean initiation, and delay start options. Indicator lights illuminate to confirm selected features. Refer to the panel diagram within this manual for specific button locations and their corresponding functions, ensuring effortless operation and maximizing your oven’s capabilities.
Setting the Clock & Time
Accurate timekeeping is crucial for utilizing the oven’s timer and delay start features. To set the clock, press the “Clock” or “Time Set” button – consult your control panel diagram for the exact label. The display will flash, prompting you to enter the correct hour and minute using the numeric keypad or arrow buttons.

Confirm your selections by pressing the “Clock” or “Time Set” button again. Ensure you’ve selected the correct AM or PM designation. A properly set clock enables precise cooking schedules and ensures the delay start function operates as intended, providing convenient meal preparation.
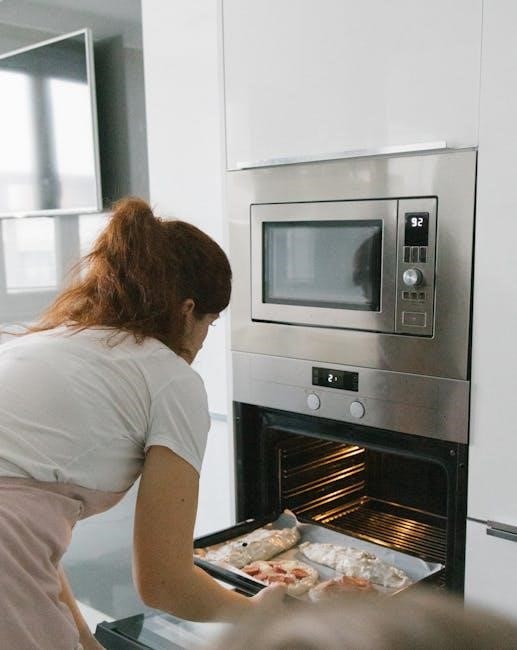
Oven Operation – Upper Oven
The upper oven offers versatile cooking options, including Bake and Broil functions. To initiate the Bake function, press the “Bake” button, then enter the desired temperature using the numeric keypad. Confirm your selection, and the oven will preheat to the set temperature. For Broiling, select the “Broil” button and choose between high or low broil settings.
Remember to position your rack appropriately for optimal results. Always monitor food closely when broiling to prevent burning. The upper oven’s independent operation allows for simultaneous cooking at different temperatures, maximizing efficiency and convenience.
Bake Function – Upper Oven
Utilizing the Bake function in the upper oven is straightforward. First, press the “Bake” pad on the control panel. The display will prompt you to enter the desired baking temperature using the numeric keys. After inputting the temperature, press “Start” to begin preheating.
For precise cooking, utilize the “Time Bake” option to set both temperature and cooking duration. The oven will automatically shut off when the set time elapses. Ensure proper rack placement for even heat distribution. Always consult recipes for recommended temperatures and baking times.

Broil Function – Upper Oven
The upper oven’s Broil function delivers intense, direct heat from above, ideal for browning and finishing dishes. To activate, press the “Broil” pad on the control panel. You can select between “Hi Broil” for maximum heat or “Lo Broil” for gentler browning.
Always use broil-safe cookware and position the oven rack appropriately – typically 6-8 inches from the broiler element. Monitor food closely during broiling, as it can burn quickly. For best results, leave the oven door slightly ajar during broiling to regulate temperature and prevent overheating.
Oven Operation – Lower Oven
The lower oven operates independently from the upper oven, offering flexibility for simultaneous cooking. To begin, press the “Bake” or “Broil” pad, then use the number pad to set the desired temperature. Confirm your selection by pressing the “Start” pad.
The lower oven’s digital display will show the set temperature and remaining cook time; You can adjust the temperature or time during operation using the corresponding pads. Remember to always use oven-safe cookware and follow recommended cooking times for optimal results. The lower oven is perfect for larger dishes or extended baking.
Bake Function – Lower Oven

Utilizing the Bake function in the lower oven is straightforward. First, press the “Bake” pad on the control panel. The display will prompt you to enter the desired baking temperature using the numeric keypad. After inputting the temperature, press “Start” to initiate the baking process.
For precise cooking, you can also set a specific bake time. The oven will automatically shut off when the set time elapses. Ensure proper rack placement for even heat distribution. This function is ideal for casseroles, breads, and other baked goods requiring consistent, moderate heat.
Broil Function – Lower Oven
The Broil function in the lower oven delivers intense, direct heat from above, perfect for browning and searing. To activate, press the “Broil” pad on the control panel. You can select between high and low broil settings for varying levels of intensity.
Always use broil-safe cookware and position the oven rack appropriately – typically the highest or second-highest position – to achieve desired results. Monitor food closely during broiling, as it cooks rapidly. Remember to leave the oven door slightly ajar during broiling to prevent overheating and ensure proper ventilation.
Using the Convection Feature
The convection feature utilizes a fan to circulate hot air evenly throughout the oven cavity, resulting in faster and more uniform cooking. To activate, press the “Convection” pad on the control panel. This is ideal for baking multiple items simultaneously or achieving crispy textures.
When using convection, reduce the recipe temperature by 25°F and check for doneness slightly earlier than the recommended time. Convection is particularly effective for roasting meats, baking cookies, and preparing pies. Ensure proper air circulation by avoiding overcrowding the oven racks.
Self-Cleaning Cycle
The self-cleaning cycle utilizes high temperatures to burn off food residue within the oven. Before initiating, remove all racks, cookware, and any loose debris. Select the desired cleaning cycle length – light, medium, or heavy – based on the oven’s soil level.
The door will automatically lock during the cycle and remain locked until the oven cools sufficiently. Avoid opening the door manually during operation. Ensure adequate ventilation, as the process may produce odors. Once complete, allow the oven to cool completely before wiping away any remaining ash.
Troubleshooting Common Issues
If the oven fails to heat, first verify the power supply and ensure the control panel is properly set. A tripped circuit breaker or incorrect settings are frequent causes. For uneven baking, confirm the oven is leveled and avoid overcrowding. If the self-cleaning cycle doesn’t start, check the door is fully latched.
Error codes displayed on the control panel indicate specific problems; consult the “Understanding Error Codes” section for details. If issues persist, avoid attempting repairs yourself and contact Maytag customer support for assistance from a qualified technician.
Care and Maintenance
Regular cleaning extends the life of your Maytag Gemini double oven. After each use, wipe down the interior with a damp cloth and mild detergent. Avoid abrasive cleaners, which can damage the surfaces. The stainless steel exterior benefits from specialized stainless steel cleaners to prevent streaks and maintain its appearance.
Periodically inspect door seals for damage and replace if necessary. For the self-cleaning cycle, remove all racks and accessories. Following these simple maintenance steps ensures optimal performance and prevents potential issues, keeping your oven functioning efficiently for years.

Understanding Error Codes
Your Maytag Gemini double oven utilizes error codes to diagnose potential problems. These codes appear on the control panel display, signaling a specific issue requiring attention. Common codes include F1 (temperature sensor failure), F2 (ignition failure – gas models), and F3 (communication error).
Consult the complete error code list within this manual or on the Maytag website for detailed explanations and recommended solutions. Some errors may be resolved by simply resetting the oven, while others necessitate professional service. Ignoring error codes can lead to further damage or unsafe operation.
Warranty Information
Your Maytag Gemini double oven is covered by a limited warranty against defects in materials and workmanship. The standard warranty period is one year from the date of original purchase, covering parts and labor for any repairs. An extended warranty may be available for purchase, offering additional coverage for a longer duration.
This warranty excludes damage resulting from misuse, improper installation, or normal wear and tear. To initiate a warranty claim, retain your proof of purchase and contact Maytag Customer Support. Full warranty details, including exclusions and limitations, are outlined in the separate warranty document included with your oven.
Frequently Asked Questions (FAQ)
Q: Why is my upper oven not heating? A: Ensure the oven is properly set to Bake or Broil and the control panel is locked. Q: How do I activate the self-cleaning cycle? A: Press the ‘Self Clean’ button and select the desired cleaning duration. Q: What does error code ‘F2E1’ mean? A: This indicates a temperature sensor failure; contact customer support.
Q: Can I use aluminum foil in the convection oven? A: No, it can damage the oven’s interior. Q: How often should I clean the oven racks? A: Clean them regularly with warm, soapy water. For further assistance, consult the troubleshooting section or contact Maytag.
Contacting Maytag Customer Support
For immediate assistance with your Maytag Gemini double oven, please utilize the following resources. Phone Support: Call our dedicated helpline at 1-800-MAYTAG-CARE (1-800-629-8242) available Monday-Friday, 8 AM to 8 PM EST. Online Support: Visit our comprehensive support website at Maytag.com/support for FAQs, troubleshooting guides, and parts ordering.
Live Chat: Engage with a support representative via live chat on our website during business hours. Social Media: Connect with us on Twitter @Maytag to receive updates and assistance. Ensure your model number (MET8720DS) is available when contacting support for efficient service.
Technical Specifications
Model Number: MET8720DS. Oven Capacity (Upper): 2.7 cu. ft. Oven Capacity (Lower): 2.7 cu. ft. Total Oven Capacity: 5.4 cu. ft. Power Requirements: 240V/208V, 60Hz, 30 Amps. Gas Type (If Applicable): Natural Gas or LP. Dimensions (WxHxD): 30″ x 52″ x 28″. Weight: Approximately 280 lbs.
Control Type: Electronic Touch Controls. Self-Cleaning System: Standard. Convection Cooking: Yes. Broil Element Wattage: 3200W (Upper & Lower). This model may exhibit inconsistent performance despite its dual oven capacity.